
A Step-by-Step Guide to DIY Engine Bay Cleaning


Introduction to Engine Bay Cleaning
Keeping your engine bay clean is crucial not only for aesthetic purposes but also for maintaining the health and performance of your vehicle. A clean engine bay can make it easier to spot leaks, wear, and other potential issues before they become serious problems. In this guide, we'll walk you through the steps to achieve a spotless engine bay.
While this task might seem daunting at first, with the right tools and techniques, you can carry out the cleaning process safely and efficiently. Let's dive into the steps you need to take to ensure your engine bay looks like new.
Gathering Your Tools and Materials
Before you begin the cleaning process, it's essential to have all the necessary tools and materials on hand. This will ensure a smooth and uninterrupted workflow. Here's what you'll need:
- Protective gloves and eyewear
- Plastic bags and tape for covering sensitive components
- A stiff-bristle brush and a soft-bristle brush
- A quality engine degreaser
- A microfiber cloth
- Access to a water hose or pressure washer
- An air compressor or leaf blower (optional)
Preparing Your Vehicle
Start by parking your car in a well-ventilated area. Ensure the engine is cool before you begin cleaning to avoid burns and to ensure the cleaning products work effectively. Next, disconnect the battery or simply remove it if you prefer.
Use plastic bags and tape to cover any sensitive components like the alternator, air intake, and exposed wiring. This step is crucial to prevent water and cleaning agents from causing damage.
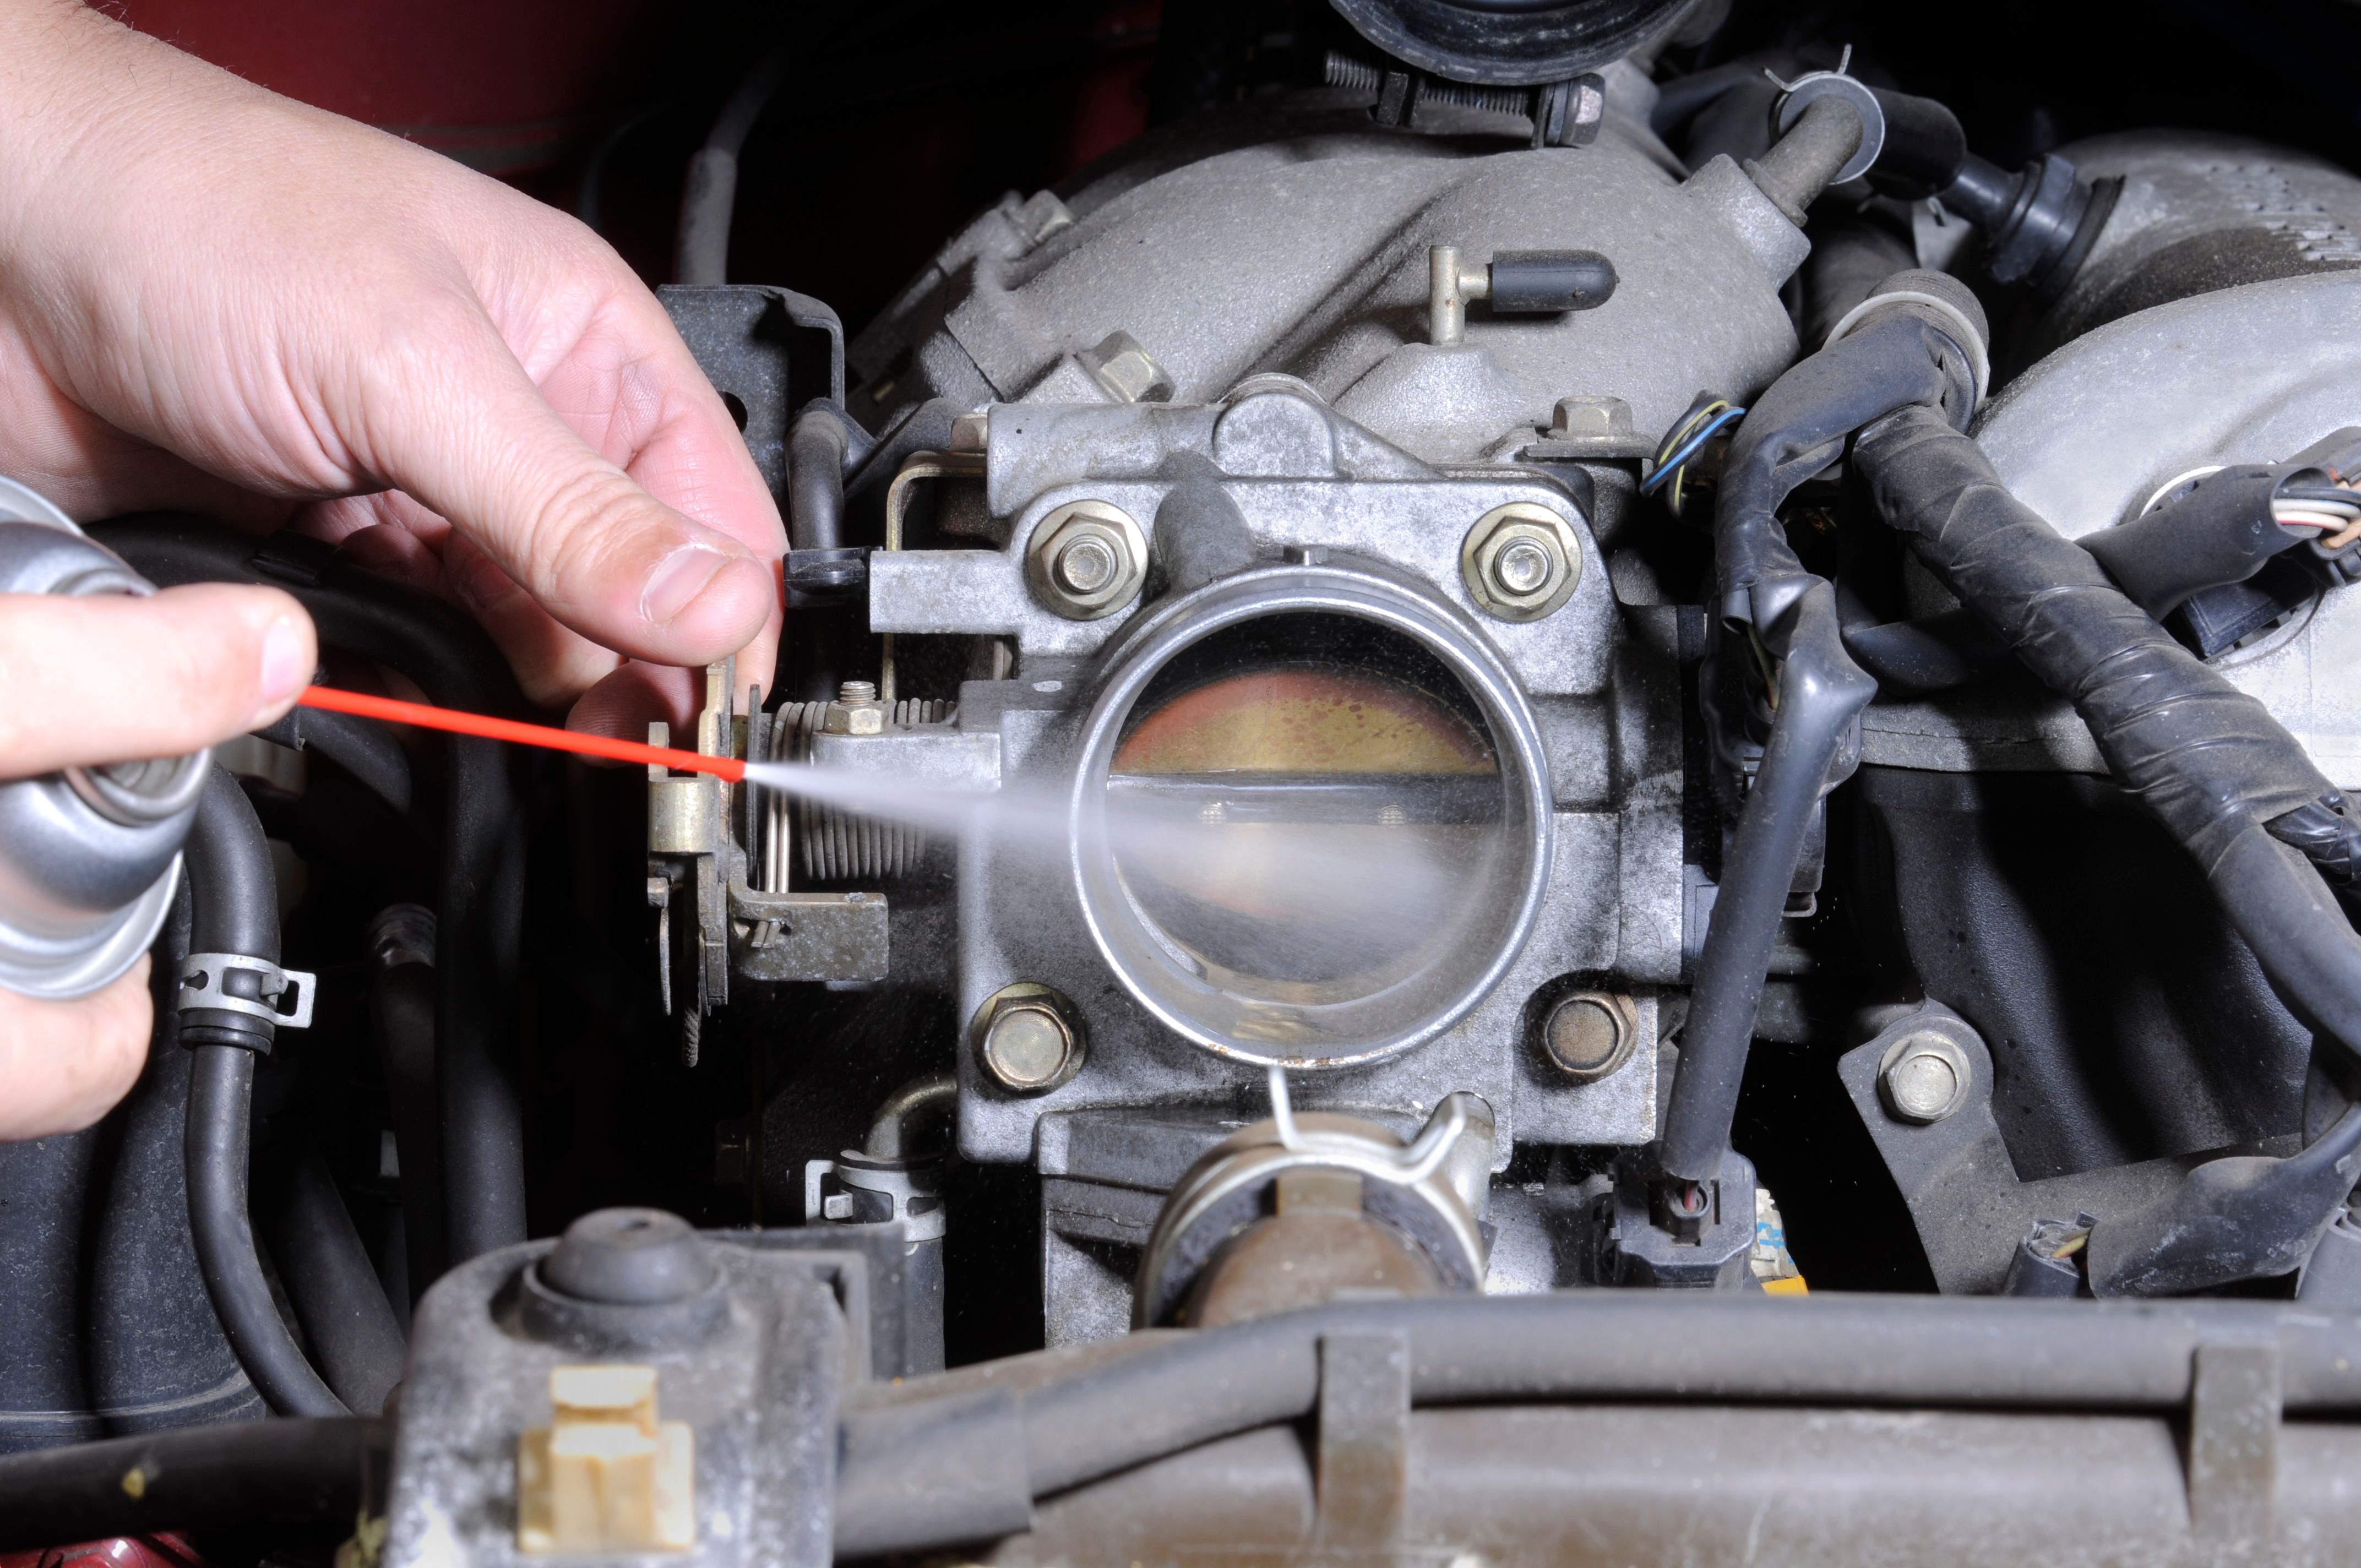
Cleaning Process
With your vehicle prepared, it's time to start cleaning. Begin by applying the engine degreaser to the entire engine bay, focusing on areas with visible oil and grime buildup. Allow the degreaser to sit for a few minutes to break down the dirt.
Using a stiff-bristle brush, scrub the heavily soiled areas. For more delicate parts, switch to a soft-bristle brush to avoid causing damage. Take your time with this step to ensure all dirt and grease are removed.
Rinsing and Drying
After scrubbing, rinse the engine bay thoroughly with water. A gentle flow from a hose is usually sufficient, but a pressure washer can be used with caution. Avoid directing water at electrical components or connectors directly.
Once rinsed, use an air compressor or leaf blower to remove excess water from the engine bay. Follow up with a microfiber cloth to dry any remaining moisture, paying special attention to nooks and crannies.

Finishing Touches
With the engine bay clean and dry, remove all protective coverings from sensitive parts. If you removed your battery earlier, reconnect it now. Take a moment to inspect your work and ensure all components are in place.
For an added touch of professionalism, consider applying a rubber or vinyl protectant to hoses and plastic covers. This will help maintain their appearance and prevent cracking over time.
Regular Maintenance
Now that your engine bay is clean, establish a regular maintenance schedule to keep it that way. Periodic cleaning will not only enhance your vehicle's appearance but also extend its lifespan by helping you catch potential issues early.
By following these steps, you can confidently tackle engine bay cleaning as a DIY project. With practice and patience, your efforts will result in a pristine engine bay that enhances both the look and function of your vehicle.